


Kahr P40 [HD] Cleaning & Features
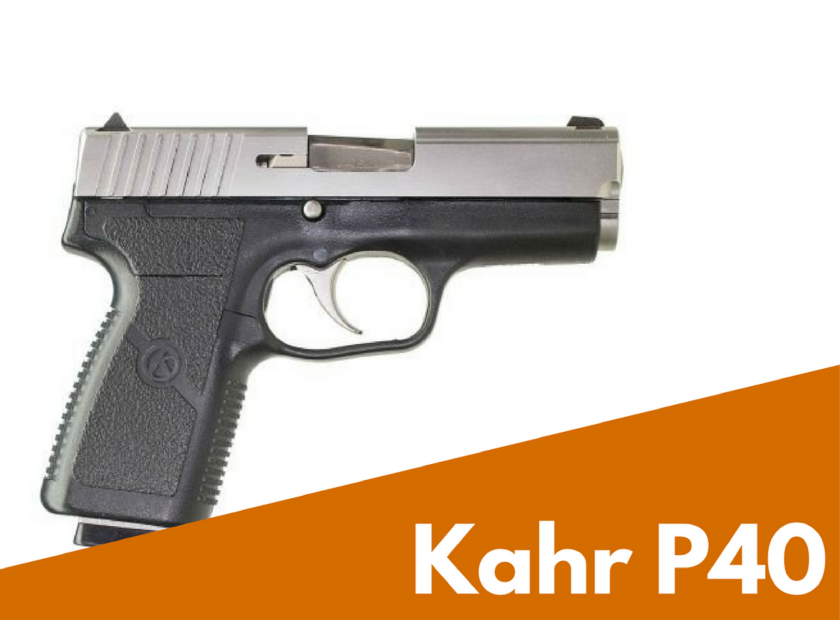
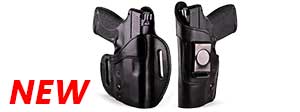
The Kahr P40 is an extremely popular double action only (DAO) striker-fired pistol, especially for concealed carry. It comes in two models, the P40, which is all-steel, and the PM40, which features a polymer frame.
The barrel is stainless steel and comes in at 3.5 inches. The slide and frame are slim, which adds to the concealability and ergonomics of the P40. There is no external safety, just the slide lock/takedown pin.
The P40 has a magazine capacity of 6+1, and it may be a little "picky" about what type of ammunition it likes. The Kahr is very popular for its ergonomics and ease of use.
Continue scrolling to see our full gun cleaning & gun review!
Here is a transcript of the video:
Today we’re going to be doing a full field strip and cleaning of the Kahr P40. Now I reached out to Kahr and asked them what’s the "P" mean and they got back to me and told me that the P stands for premium. So there you go, a little extra info for you.
Like I said, today were going to be doing a full field strip and cleaning of this firearm. It’s a great gun for concealed carry. It’s extremely light, weighing in at just 15 ounces unloaded. Of course the first thing we want to do is make sure that the gun is safe.
I’m going to eject the mag check that nothing is inside the magazine. We’ll open up that slide and as you can see there is no round in the chamber so we’re good to go for cleaning this gun. Now with this gun the slide catch is also your takedown pin. There’s a slight little half-moon groove in your slide.
You’re going to have to line up with a little lip that’s just towards the back of your slide catch. All you need to do is bring back the slide a little bit. A lot of times lets take my thumb and grab the rest of the slide with my fingers and I want to line up this little groove in there because then what I can do is I can then push the pin from the other side out.
To show you how easy it is just push up and your pin comes out. Now with this gun, to take off the slide you will have to depress the trigger, of course do it in a safe direction. Once you do your frame your slide should come right apart. So immediately were going to be working on a lot of the slide components.
First were going to take off our recoil spring and our guide rod. These are not compounded so just be careful that they don’t go flying over the place. Easiest way is to just take your finger put it on the back and hold on because that spring is a little tight, but it will come right out. As you see the guide rod and the recoil spring are two separate entities, but we’ll get to those just as soon as we can get our barrel getting started.
To get the barrel out of course you just want to go in from that ejection port. You just lift up and bring your barrel out at an angle. What we want to do is get this barrel into some solvent because you might not be able to see it on camera but there is quite a bit of excess powder inside this barrel. So we definitely want to start getting that out.
Easiest way is to do it with a lead and then putting a patch basically on it but an even easier way to do it, so you don’t have to keep it exchanging out different pieces to your cleaning rod, is just to take one of your cleaning swabs and wrap your brush with it. This just makes it a whole lot easier; you can still get your barrel coated, and of course saves you some time.
Ultimately if you don’t have one of those leads just helps you save money. I always put a little bit of what I use this Hoppes elite. It cleans and removes carbon, lead, copper, and scent free. It’s actually a pretty good product, but just going to go ahead and coat that barrel a little bit. Make sure to let that sit in there for a little bit so it’ll start removing all those deposits.
With that were just going to set the barrel off to the side. Next thing we want to work on is our slide. Now of course when rounds are fired, you’re going to have all different kinds of debris coming and blowing back inside your gun, even where part of your bolt will side along other rounds to engage another as you can see there’s some brass right on top of here and some copper and were going to try and work that out too.
Easiest way just to take your nylon brush, you can even use a toothbrush if you wanted to but this just helps you to give it a little bit more of a scrub and a deep clean to again get all that excess material. Now I’m not going to use a lot, just a little spray is all you do. As you can see you can see a little white part here on the brush that just has a slight bit of that solvent in there.
I’m going to go through my slide rails. I’m also going to scrub that area where it grows and crosses some of those other rounds that are in the magazine. I also want to get my bolt face. As you can see, there’s brass and copper or an excess powder on there.
A lot of times what I’ll do is especially with a striker fire gun is I’ll turn it upside down that way I’m not getting in solvent inside of the striker fire system but definitely give that a good scrubbing. Also this is where your extractor is and there can be build-up behind this eventually if you don’t clean it you’re not going to have your rounds ejecting properly. Scrub a little bit on the inside of the slide to.
Again don’t need to use too much, a little bit of solvent will go a long way with the pistol. But now that we got that all set, we’re just going to set this slide off to the side. Now a lot of people like to use oil when working with their firearm. You honestly don’t have to; it’s not entirely necessary.
Maybe in a very small amount, which I will use a little bit, a small amount, but when I use oil I’ll use Ballistol. This is a multi-purpose oil and it does great for lubricating your pistols but you don’t need a lot. All you’re going to need is literally just a small little spray like that. You don’t want to have too much of this excess oil in your gun because then its just going to attract more of that powder and dirt which you’re going to have to end up cleaning more later.
I’m going to go over my guide rod to make sure that it’s lubricated and cleaned as you can see there some of those deposits that are left on it. Then of course I’m going to go over my recoil spring too just to get a little coating oil and get any kind of deposits that might be left on this as well. Again, this oil just helps keep your gun lubricated and it keeps it from basically having to be replaced constantly. But now you have a little bit of coating on the guide rod and on the recoil spring.
We’re going to still let though that solvents it based on that slide and on the barrel but we are going to move on to our frame. Now this is a polymer frame and the slide rails are polymer, but it never hurts to put just a little bit of cleaner or solvent or a little bit of oil on these. I’m going to use the solvent just to make sure I get any of that excess grime off of there. Just go over the rail a little bit. Make sure you get it so you can lift up any of those deposits. They get inside where the trigger is. These metal parts will need to be cleaned.
This is just going to be a field strip, you can take this gun down further but it’s not entirely necessary if you keep up with the maintenance of your guns. That pretty much takes care of the frame. Another good place to clean is inside the mag well. There are no metal parts in here kept for our little retention spring for the mag release.
It’s not entirely necessary for this pistol but what I want to do next is just wipe off any of that excess solvent or oil. Again, if that’s just sitting in your gun it’s going to attract all that dirt all that powder anything that can come in contact with the pistol. Alright and as you can see even on polymer it gets quite dirty so again very important to wipe these things down.
Now that we’ve pretty much coated everything we’re going to work from where we started. Since the barrels been sitting the longest, we’re going to work with that. Just need yourself with a P40 there’s a magnet I have a nine-number here but I do have a 40-cal brush here. I’m going to screw that on and what I like to do is I don’t ever like to go through the muzzle end of the gun.
Of course this is where your crown and this is where the end of your rifling is so if this gets chipped or messed up in any sort of manner especially when you’re using say a metal cleaning rod like this or even brass is a lot softer, but I find it most beneficial to just go in through the bore side and since that solvent has been sitting in there this brush should be able to lift up any of that excess that’s on there.
If you’ve let your gun sit for a long time it is good to do repeat cleaning for your barrel scrubbing, wiping down, scrubbing wiping down. But if you just come in a range and you clean your gun every single time, just a couple swabs is all it really takes. As I was telling you before there was a lot of deposits in there and it cleaned up quite nicely.
You might not be able to see it on camera but this Hoppes Elite does wonders for lifting up that grime out of there. Now of course I want to do the same thing before I just want to get any of that excess cleaner out of there. I’m going to wrap my brush on the swab, just make sure get all that excess stuff out of there.
As you can see, that’s what we’re taking out of your gun each time or that’s what’s left in our gun each time you fire it. We’re good and clean as a whistle. Something else I’d like to mention especially since the Kahr P-40 does you need good ammo. A lot of times clogs are a hard time in the firearm but it usually has to do with the feed ramp.
Something you can do is just make sure that you do clean your feed ramp. Take a little bit of solvent, again just a tiny little bit, and make sure that I clean this whole area and if there’s any kind of build-up its just going to make it harder to the hardest they even fire the gun. After that your barrel is done.
We’re going to move on to next is the slide. Now again, we’re just trying to wipe down any of that excess material well any extra solvent that’s in there. Make sure we get our bolt face or the extractor is to get all the slide rails.
Again, this is why we clean our firearms. All that dirt and grime just came out of there. We’re going to wipe down the frame and this pistol is now ready to be put back together.
So we just have to work backwards and actually before that just for fun we are going to put a little bit of oil on this gun. Again, just a slight bit as you see just a little spray. Now I’m just going to touch up wherever there’s going to be friction on the gun where the barrel meets the slide on the side rails.
Again, it doesn’t take a whole lot and maybe we’ll even wipe down the whole side. Just get a nice little coating on it and it’ll just help protect from rust. If you are carrying this gun and it is touching your body the natural oils and the sweat form you will rust the gun, but a little bit of oil will help protect it. I'll do the same thing with the barrel and just a tiny bit of oil; just enough to give a little film over this metal.
As you can see it’s still picking up stuff; all that powder fouling and carbon and all that stuff that’s left in there. Now that that’s done we’re going to put this thing back together. Of course we want to do is take your barrel first and your slide. Insert your barrel at an angle. Drop it in but make sure you push it all the way back so it seats properly. Then take your guide rod and your spring.
Now make sure you know that spring has a smaller end and then a larger end and then larger end is going to go onto the slide. My smaller end is going to go onto your guide rod. If you put the smaller leg forward there’s a potential that it could come through this end of the slide and then of course your guns not going to be operable.
It does take a little bit of effort but just make sure you guide it in and give it a good little push. See I’m even having trouble. All right, there we go. Now with this barrel it doesn’t have an exact groove that it can go into so you just got to make sure that it is seated properly. You don’t want it off to the side like so and this is just going to make your gun not even operable.
Make sure that the guide rod is straight on and make sure your slide rails line up with your slide. Go ahead and put your slide back on. Now with this the easiest way is literally to insert the pin first just slightly. You want to grab that little barrel lug that’s on the barrel.
This will allow you to now pull the slide back so you can line up this lip as you can see is a little shinier than the rest of that slide catch with that half moon of a piece on that slide. Just give it a good little push and you’re Kahr is now ready to carry or take back out to the range.
As mentioned this is an extremely ergonomic firearm. It’s pretty slim and it conceals really well. We’re going to go over some features of the Kahr P40 starting from the top.
As you can see here we’ve got a three-dot sight system there are drift on sights and the slide is made from stainless steel. The sights are pretty heavy-duty actually so much so that you could rack it on your clothing. Now if you needed to do a one-hand rack with this firearm like I said the slide is stainless steel and so is the barrel.
Once thing with this firearm though and it’s good that it has aggressive slide serrations because it is a little bit stiff. That recoil spring is a little stiff although it will break in over time. Moving up to the frame, the frame is the same width as the slide giving it those ergonomics and good aesthetics to it.
Really good for concealed carry and the only thing that you have here on the frame aside from the magazine release is the slide catch, which also functions as the takedown pin. Moving down here to the grip, the grip itself isn’t very aggressive on the sides but here on the back, the back strap in the front you’ve got some texturing there that’s similar to a Springfield XDS.
The trigger is a little bit longer. Pull feels like a double action trigger. Really there’s the brake and the reset is pretty minimal. You don’t feel it at all in the trigger. Moving on down to the magazine release, it’s a small circle so if you’re used to something like a Glock, it’s going to be a little bit smaller than what you’re used to.
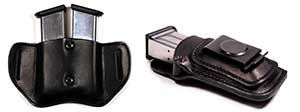
For the magazine you have a six plus one capacity and from what we’ve heard this firearm is a little bit choosy about what kind of ammunition you put through it but you’ve got a slim single stack magazine here. But, a little bit of a pinky extension there at the bottom.
Overall this is a great gun for concealed to carry; it's slim in the profile, conceals really well and it’s fairly affordable. We hope this has helped you out. If you liked this video and you want to see more videos like this, subscribe to our YouTube channel.
We’ve always got more videos coming out with firearms care, cleaning, tips, and tricks with firearms instructions and best concealed carry practice as well as information on utilizing the entire line of Urban Carry Products.
You can find more information through our social media channels on Facebook, Instagram, and Twitter just by searching Urban Cary Holsters. That’s all for the Kahr P40 and until next time, keep calm and return fire.
